This module will walk you through what you need to keep in mind before you start your interview as well as give you pointers as you conduct your interview and what to do after your interview.
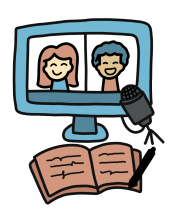
Your interview day is finally here. Whether you will be conducting your interview in person or virtually, there are a couple of things you need to keep in mind the day of your interview that will help you and your narrator have a smooth recording experience.
- If you have not gotten your consent form signed by the narrator before the day of the interview, now is the time to get it signed. Some narrators may feel more comfortable signing the form after their interview. This is fine, but do not forget to get it signed immediately after the interview. It may be challenging to get it signed after you and the narrator part ways.
- It may be a good idea to take a photograph or two of your narrator, particularly if you are doing an audio-only recording. It is also a good idea to photograph any visual aids the narrator makes reference to in their interview like photographs, scrapbooks, or any objects. Taking photographs can happen before or after your interview, or during a break. It is not a good idea to stop or interject to take a picture while your narrator is in the middle of speaking. If you choose to take photographs, please have your narrator sign a photo consent form, see OC&SEAA Photo Consent Form.
- If this is your first time meeting the narrator in person (or virtually) it is a good idea to ask for the correct pronunciation of their first and last names, preferred names, and their pronouns.
- If you and the narrator discussed incorporating artifacts in your interview now is the time to ask if they brought them. Make sure they are handy during the recording.
- Ensure your and the narrator’s physical comfort. Are you and the narrator physically comfortable and are you able to sit comfortably for the duration of the interview? Before you start recording, ask the narrator if they have everything they need. See Module 3 Atmosphere and Participant Wellness for a refresher.
- Pause and get collected. You and/or the narrator may get emotional during the interview, so taking a moment for both of you to prepare is a great way to ensure no one feels blindsided by the interview process.
While you may have already conducted a pre-interview recording as advised in Module 3, it is a good idea to conduct another practice session the day of your interview in case has changed.
- Test the volume, sound, lighting (for video), background, and positioning of your recording device by recording a short (1-5 minute) practice session.
- Ask the narrator to talk about a subject that they do not plan to discuss as part of their oral history. The reasoning behind this is that the affective impact of something that is revealed the first time is not as strong when it is rehearsed or is mentioned the second time. You do not want your interviewee to get started on the planned topic of discussion too soon.
- As mentioned in Module 3, building rapport with your narrator is important and the practice session is a good opportunity to establish it. Your narrator will share personal experiences with you and so they might feel vulnerable. Attempt to put your narrator more at ease by sharing something about yourself.
Beginning of interview
- State your name, time, date (with day of the week) and place (if conducted virtually, state your location first), introduce your narrator (if conducted virtually, state narrator’s location).
- Introduce the topic of the interview and provide context that will lead up to the first question.
Example: Hello my name is Peter the Anteater, today is Friday, October 30th, 2020. It is two o’clock in the afternoon. I am conducting this interview virtually in my home in Long Beach, California. I am here with Chancellor Howard Gilman who is conducting this interview from his home in Irvine, California.
During the interview
- Listen, listen, listen. Even though you came prepared with a list of questions, the narrator is sharing a piece of their lived experiences and sometimes unexpected events, people, stories are revealed. Instead of following your script, allow for a more fluid interview by asking follow up questions based on what the narrator reveals. If the narrator mentions the name of a person that is relevant to the topic being discussed, ask them to provide contextual information that will help researchers know more about this person and their role in this particular topic.
- If the narrator is going too far off into a tangent use your list of questions to help them back to the subject.
- Maintain the focus of the interview on the narrator and their story. Do not insert your opinions or make too many audible agreement or disagreeing noises (i.e. “yes,” “okay,” “mmhmm,” etc.). Feel free to nod, smile, or give the narrator other non-verbal clues to communicate with them how you are feeling.
- Write field notes as you listen to the narrator. Sometimes narrators are revealing many interesting facts at once that it may be challenging to follow up on all of them. Writing down your observations and questions as the narrator speaks will help you with asking follow up questions and crafting the direction of the interview, see OC&SEAA Sample Field Notes.
- Supply your narrator with paper if they need to communicate something to you that they do not want to voice (need for a restroom break, need to stop, etc.). This can be tricky in the virtual environment but assure the narrator that the recording will be edited accordingly.
- If there are other people there to assist or listen, supply them with paper (or ask them to write their comments or questions in advance) so that they can jot down their follow up questions and slip them to you. Ideally you want to limit the number of speakers in the interview to just the people who were introduced at the beginning of the recording. If you have other members present, ask them to help you document key events, people, dates via a time log. A time log is a document that outlines the topics discussed along with a timestamp for when it was discussed, see OC&SEAA Sample Time Log.
- Remember to bring up the use of artifacts or visual aids if the narrator mentions them. Ask them to describe the object (date and location of creation) and give as many visual cues, particularly if you are recording audio-only.
- At the end of the interview have a brief concluding statement. An example is, “This concludes our [date] interview with [narrator’s name]. [Narrator’s name] thank you for participating in this project.”
After the recording, make sure the narrator understands how these interviews will be available, and communicate your projects’ next steps. You may have already had this conversation with your narrator but it may be a good idea to remind them where, when, and how this interview will be accessible at the end of your interview. Thank them for their time and remind them about the importance of their contribution.
Take the time to process your experience of being an interviewer/listener in order to be attentive to your wellness during this oral history journey. There are several approaches you may consider such as journaling or writing field notes about the experience, reading and exploring additional resources related to the interview you have just conducted, talking to a peer or colleague about the experience, or seeking the counsel of a trained professional such as a therapist (this is especially helpful if you have interviewed a number of people who share stories of trauma). Self care and self awareness are essential components of the oral history process and should be given the time and space in any oral history project.